Screenshots are an essential tool for capturing and sharing information on your Mac. Whether you need to save an important document, share an error message with tech support, or create content for tutorials, macOS offers multiple ways to take screenshots.
In this comprehensive guide, we’ll cover all the methods to take a screenshot on your Mac, including keyboard shortcuts, the Screenshot app, Touch Bar screenshots, editing options, and how to change the default save location.
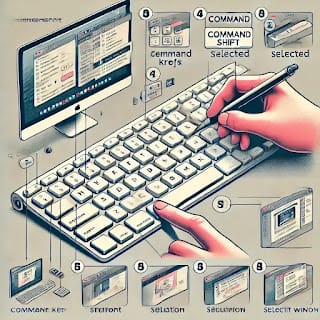
1. How to Take a Screenshot of the Entire Screen
If you want to capture everything on your screen, follow these simple steps:
Using Keyboard Shortcut
- Press Command (⌘) + Shift + 3
- The entire screen is captured, and the screenshot is automatically saved to your Desktop.
Where is the Screenshot Saved?
By default, macOS saves screenshots as .png files on your Desktop. If you prefer a different save location, you can change it (explained later in this guide).
2. How to Capture a Specific Portion of the Screen
Sometimes, you don’t need the entire screen but just a portion of it. macOS lets you do this easily.
Using Keyboard Shortcut
- Press Command (⌘) + Shift + 4
- Your cursor changes into a crosshair
- Click and drag to select the portion of the screen you want to capture
- Release the mouse or trackpad to take the screenshot
Tip: While dragging, you can press the Spacebar to move the selection, or press Esc to cancel.
3. How to Take a Screenshot of a Specific Window
macOS also allows you to take a screenshot of a single window, which is helpful for tutorials and presentations.
Using Keyboard Shortcut
- Press Command (⌘) + Shift + 4
- Then, press the Spacebar (your cursor turns into a camera icon)
- Click on the window you want to capture
- The screenshot is saved to your Desktop
Bonus: macOS automatically adds a subtle drop shadow around the window. If you want a shadow-free screenshot, press Option (⌥) while clicking.
4. How to Use the Screenshot App (Advanced Screenshot Options)
If you prefer a visual tool instead of shortcuts, macOS has a built-in Screenshot app with a user-friendly interface.
How to Open the Screenshot App
- Press Command (⌘) + Shift + 5
- A small menu appears at the bottom of your screen with options:
- Capture Entire Screen
- Capture Selected Window
- Capture Selected Portion
- Record Entire Screen (Video)
- Record Selected Portion (Video)
Customizing Screenshot Settings
- Click Options to change:
- Save location (Desktop, Documents, Clipboard, Mail, etc.)
- Timer (None, 5 seconds, 10 seconds)
- Show/hide mouse pointer
Pro Tip: The Screenshot app also lets you record your screen for video tutorials!
5. How to Screenshot the Touch Bar (MacBook Pro Only)
If you own a MacBook Pro with a Touch Bar, you can capture a screenshot of it using this shortcut:
- Press Command (⌘) + Shift + 6
- The Touch Bar screenshot is automatically saved to your Desktop
6. How to Change Screenshot Save Location
By default, macOS saves all screenshots to the Desktop. If you want to organize your screenshots better, you can change the save location.
How to Change the Save Location
- Press Command (⌘) + Shift + 5
- Click Options
- Under Save to, choose a different location (Documents, Downloads, Clipboard, etc.)
- If you want a custom folder, click Other Location… and select your preferred folder
Now, all future screenshots will be saved to the new location!
7. How to Edit and Annotate Screenshots
After taking a screenshot, a small preview appears in the bottom-right corner of your screen. Clicking on this preview opens the Markup tool, where you can:
✔ Crop or resize
✔ Draw, highlight, or add text
✔ Use shapes (arrows, circles, rectangles)
✔ Sign documents using your trackpad or Apple Pencil (on iPad with Sidecar)
✔ Share directly via AirDrop, Messages, or Mail
Pro Tip: If you close the preview, the screenshot is automatically saved without editing.
8. How to Copy a Screenshot to the Clipboard (Instead of Saving It)
Sometimes, you may want to copy a screenshot and paste it directly into an app (like Photoshop, Word, or an email) without saving it as a file.
How to Copy a Screenshot to Clipboard
Hold Control (⌃) while taking the screenshot:
- Command (⌘) + Shift + Control + 3 → Copy full screen
- Command (⌘) + Shift + Control + 4 → Copy selected portion
- Command (⌘) + Shift + Control + 5 → Screenshot menu with copy option
Now, just press Command (⌘) + V to paste it anywhere!
9. How to Delete Screenshots Automatically
If you take a lot of screenshots, your Desktop may become cluttered. You can automatically delete old screenshots using Terminal.
How to Automatically Delete Screenshots After X Days
- Open Terminal
- Type the following command: bashCopyEdit
find ~/Desktop -name "Screen Shot*" -mtime +7 -delete - Press Enter
This deletes screenshots older than 7 days from your Desktop. You can change the number (e.g., -mtime +30 for 30 days).
Final Thoughts
Taking screenshots on a Mac is incredibly easy with the built-in shortcuts and Screenshot app. Whether you need a quick capture, a precise selection, or a video recording, macOS provides a range of tools to help you.
Quick Recap:
✅ Full screen: Command (⌘) + Shift + 3
✅ Selected area: Command (⌘) + Shift + 4
✅ Specific window: Command (⌘) + Shift + 4, then press Spacebar
✅ Screenshot menu: Command (⌘) + Shift + 5
✅ Touch Bar (MacBook Pro): Command (⌘) + Shift + 6
✅ Copy to Clipboard: Hold Control (⌃) while taking a screenshot
Now that you’ve mastered all the screenshot techniques on Mac, start capturing and sharing like a pro!
// You May Like //
🔗 Windows User Accounts: How to Setup, Security & Control
🔗 How to Solve Unresponsive Programs issues of Computer
🔗 Your Phone Battery Drains Fast- How to Fix It
![]()