In today’s digital era, carrying a traditional scanner is no longer necessary. Your iPhone comes equipped with a built-in document scanner that allows you to scan, save, and share documents seamlessly. Whether it’s receipts, contracts, notes, certificates, or even handwritten pages, you can scan them with just a few taps.
This guide will walk you through everything you need to know about scanning documents using your iPhone, from basic methods to advanced scanning features. We’ll also include an infographic for easy reference.
Why Use Your iPhone as a Scanner?
✅ No Third-Party Apps Required – The built-in scanner in iOS is completely free.
✅ High-Quality Scanning – iPhone automatically detects and enhances document quality.
✅ Instant PDF Creation – Convert scanned documents into PDFs instantly.
✅ Easy Editing & Annotation – You can crop, rotate, and mark up scans.
✅ Cloud Sync & Sharing – Save to iCloud, Google Drive, or share via WhatsApp, Email, or AirDrop.
✅ Extract Text from Documents – With Live Text (iOS 15+), you can copy text directly from images.
Method 1: Using the Notes App (Best for Quick Scanning)
The Notes app on your iPhone has a built-in document scanner that allows you to scan and save documents effortlessly.
Step-by-Step Guide:
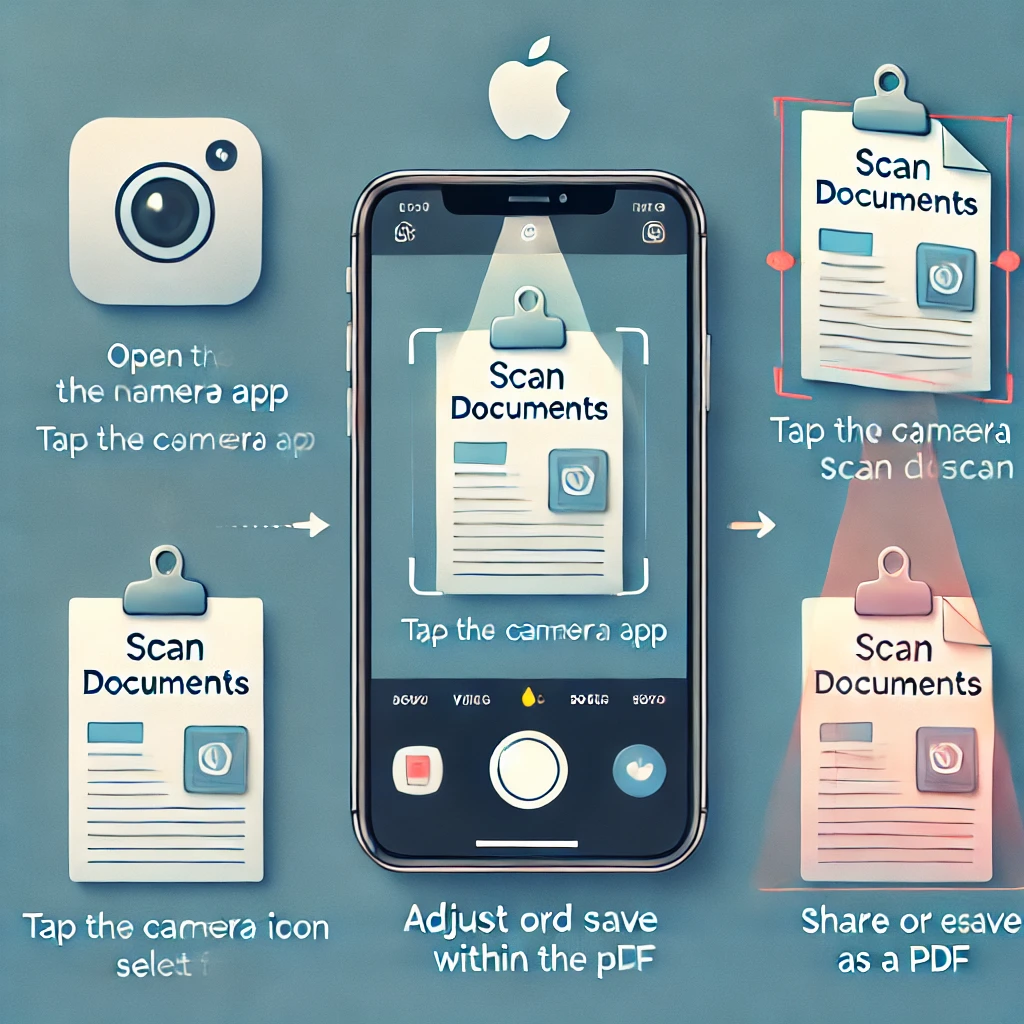
Step 1: Open the Notes App
- Launch the Notes app on your iPhone.
- Open an existing note or create a new note by tapping the + icon.
Step 2: Select Scan Documents
- Tap the Camera icon at the bottom.
- Choose Scan Documents from the menu.
Step 3: Scan Your Document
- Hold your iPhone above the document.
- The scanner will automatically detect the edges and take the scan.
- If it doesn’t capture automatically, tap the shutter button manually.
Step 4: Adjust & Save
- Drag the corners to adjust the scan if needed.
- Tap Keep Scan to confirm.
- Tap Save to store the scanned document in the note.
Step 5: Share or Export as PDF
- Tap the Share icon to send the document via Email, WhatsApp, AirDrop, or save it as a PDF.
Method 2: Using the Files App (Best for Organizing Documents)
If you prefer saving scanned documents directly to iCloud Drive, Google Drive, or Local Storage, the Files app is a better option.
Step-by-Step Guide:
Step 1: Open the Files App
- Launch the Files app on your iPhone.
Step 2: Start Scanning
- Tap the three dots (⋯) in the top-right corner.
- Select Scan Documents.
Step 3: Capture & Adjust
- Place your document within the camera frame.
- The scanner will detect the edges automatically.
- Adjust the scan manually if necessary.
Step 4: Save the Document
- Save the scanned file to iCloud Drive, local storage, Google Drive, or Dropbox.
- Rename the file for better organization.
✅ Pro Tip: The Files app allows you to store documents in folders for better document management.
Method 3: Using the iPhone Camera & Live Text (iOS 15+)
If you only need to extract text from a document instead of scanning a full page, the Live Text feature in iOS 15+ can help.
How to Use Live Text to Extract Text from Documents:
- Open the Camera app.
- Point the camera at a document with text.
- Tap the Live Text icon (yellow box with lines).
- Select and copy the text to paste it anywhere.
✅ Pro Tip: This is useful for copying text from business cards, receipts, handwritten notes, and printed documents.
Additional Features & Pro Tips
1. Edit Your Scanned Documents
- You can crop, rotate, or enhance scans before saving.
- Use the Markup tool to sign or annotate documents.
2. Save Scanned Documents as PDFs
- While saving the scan, tap Share > Save to Files > PDF.
3. Scan Multiple Pages in One Document
- After scanning the first page, tap Keep Scan and continue scanning multiple pages before saving.
4. Use Third-Party Apps for Advanced Features
If you need OCR (Optical Character Recognition) or automatic cloud backups, apps like:
- Adobe Scan (Free)
- Microsoft Lens (Free)
- CamScanner (Paid with more features)
// You May also Like //
🔗 iPhone Swipe Typing: How to Use Slide to Type Feature
🔗 How to Fix iPhone Charging Problems: Step-by-Step Guide
🔗 Your Phone Battery Drains Fast- How to Fix It
![]()